(Created page with "{{ContentNav|homelink=Documentation System|hometext=3|pagePrevious=YourCompany{{!}}Customer documentation|pageNext=IT documentation{{!}}IT documentation}} ==Product descriptio...") Tag: 2017 source edit |
No edit summary Tag: 2017 source edit |
||
| Line 13: | Line 13: | ||
{{Notebox|boxtype=warning|icon=yes|Note text=Never fill in water without immediately brewing coffee. | {{Notebox|boxtype=warning|icon=yes|Note text=Never fill in water without immediately brewing coffee. | ||
Flooding can occur if the tank is filled again afterwards!|bgcolor=}}<gallery widths="300" heights="350"> | Flooding can occur if the tank is filled again afterwards!|bgcolor=}}<gallery widths="300" heights="350"> | ||
File:kaffee-IMG 3593.jpg|alt=Coffee pot in the machine|1. Place the empty '''coffee pot''' on the machine without the '''pumping rod'''. | |||
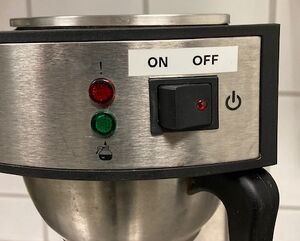
File:kaffee-IMG 3593-on.jpg|2. '''Turn on''' the coffemaker. If water has already been added, it will start running through. | |||
File:kaffee-IMG 3590.jpg|alt=Coffee filter in filter pan|3. Put a '''coffee filter''' in the filter pan. | |||
File:kaffee-IMG 3591.jpg|alt=full measuring spoon|4. Add '''8 measuring spoons''' in the coffee filter. Use the correct spoon. | |||
File:kaffee-IMG 3589.jpg|5. Attach the '''filter pan''' to the machine. | |||
File:kaffee-IMG 3594.jpg|alt=Measuring cup with 2 liters water|6. Fill the provided '''measuring cup''' with water to the 2 liters mark. | |||
File:kaffee-IMG 3592.jpg|alt=Opening of the water reservoir|7. Pour the content of the measuring cup into the water reservoir. | |||
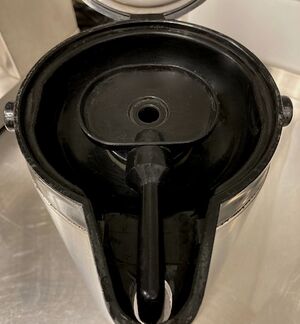
File:kaffee-IMG 3595.jpg|alt=Pumpstick in the coffee pot|8. After the coffee is ready, place the '''pump stick''' in the coffee pot. | |||
File:kaffee-IMG 3596.jpg|alt=Hallo Welt! coffee cup with coffee|9. '''Enjoy your coffee!''' | |||
</gallery> | </gallery> | ||
{{ContentNav|homelink=Documentation System|hometext=3|pagePrevious=YourCompany{{!}}Customer documentation|pageNext=IT documentation{{!}}IT documentation}} | {{ContentNav|homelink=Documentation System|hometext=3|pagePrevious=YourCompany{{!}}Customer documentation|pageNext=IT documentation{{!}}IT documentation}} | ||
Revision as of 11:42, 3 December 2021
Product description
- Material: (case and basket filter holder) stainless steel
- Incl. Stainless steel insulated pump jug 2.2 liters (inside glass and outside stainless steel)
- Brewing time approx. 5 - 6 min.
- Dry run protection
- Weight: 9 kg
- Dimensions: W 195 x L 360 x H 550
- Content: Pumping jug: 2.2 liters
- Connection: 230 V - 50 Hz - 1.9 kW
How to brew coffee

1. Place the empty coffee pot on the machine without the pumping rod.

2. Turn on the coffemaker. If water has already been added, it will start running through.

3. Put a coffee filter in the filter pan.
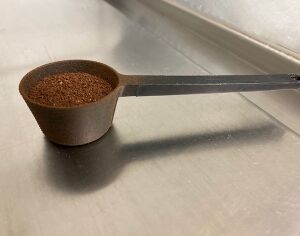
4. Add 8 measuring spoons in the coffee filter. Use the correct spoon.
5. Attach the filter pan to the machine.
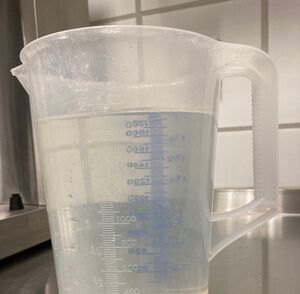
6. Fill the provided measuring cup with water to the 2 liters mark.
7. Pour the content of the measuring cup into the water reservoir.
8. After the coffee is ready, place the pump stick in the coffee pot.

9. Enjoy your coffee!


Discussions
Coffee too strong
The coffee has been a bit strong so far, could we do a test run with less coffee powder?
Well. 6 grams of coffee per cup says the instructions. And the amount of powder increases linearly with the cups. By the way: If you squeeze out the last cup of coffee, you should cook a new one right away.
The amount of powder does not increase linearly with the amount of water. See for example the article here: https://fellowproducts.com/blogs/learn/the-golden-ratio-for-brewing-coffee